
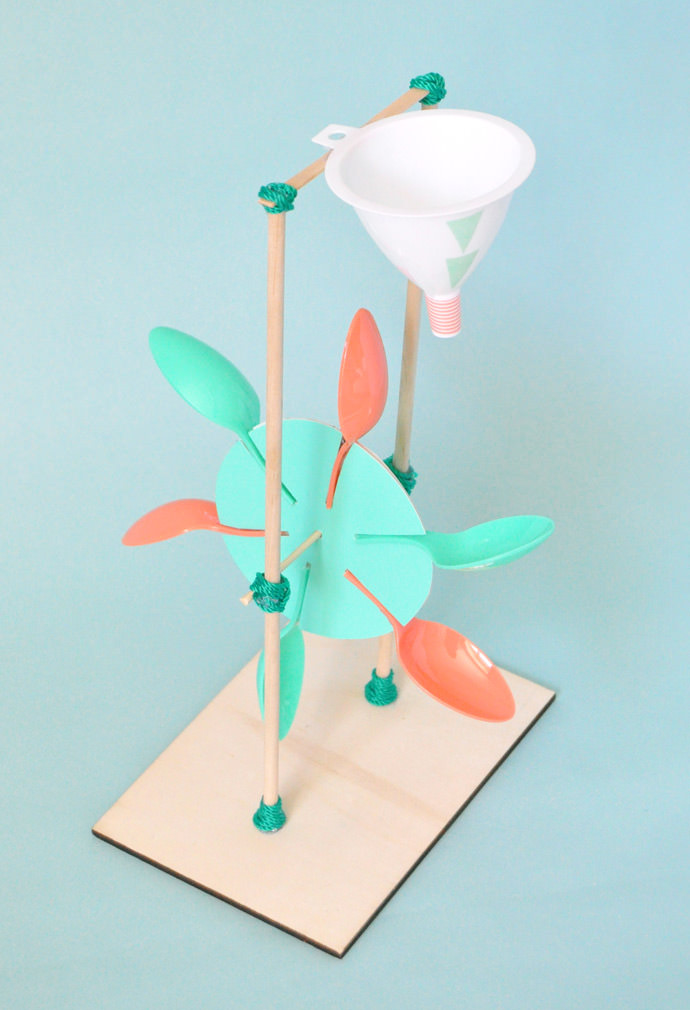
Do your kids love to tinker and fix things and come up with genius creations? Have them try their hand at this DIY sand mill toy! Supply various wooden dowels, popsicle sticks, plastic utensils, paper plates and cups and see what they can build. Look around at toy stores or online for ideas – I used this vintage tin sand mill toy as my inspiration. And this is just the beginning – you could use longer dowels and more wheels to engineer a huge sand toy set up!
This project is a great way to use up leftover and mismatching paper or plastic utensils, plates, and cups. Since this toy uses paper plates, it won’t last forever if you use wet sand or water. For a longer life, try using it indoors or in a sandbox with dry sand or pebbles. If it does start to fall apart that though, that just means it’s time to remodel and add some more doo-dads!

What You Need
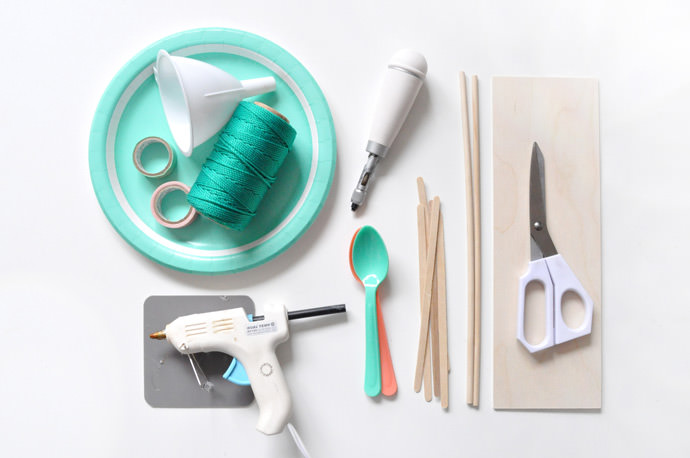
- Paper plates
- Funnel
- String
- Washi tape
- Hot glue gun
- Wooden dowels
- Screw punch
- Scissors
- Wooden skewers and coffee stir sticks
- Flat wooden rectangle
- One plastic straw
- 6 plastic spoons
How-To
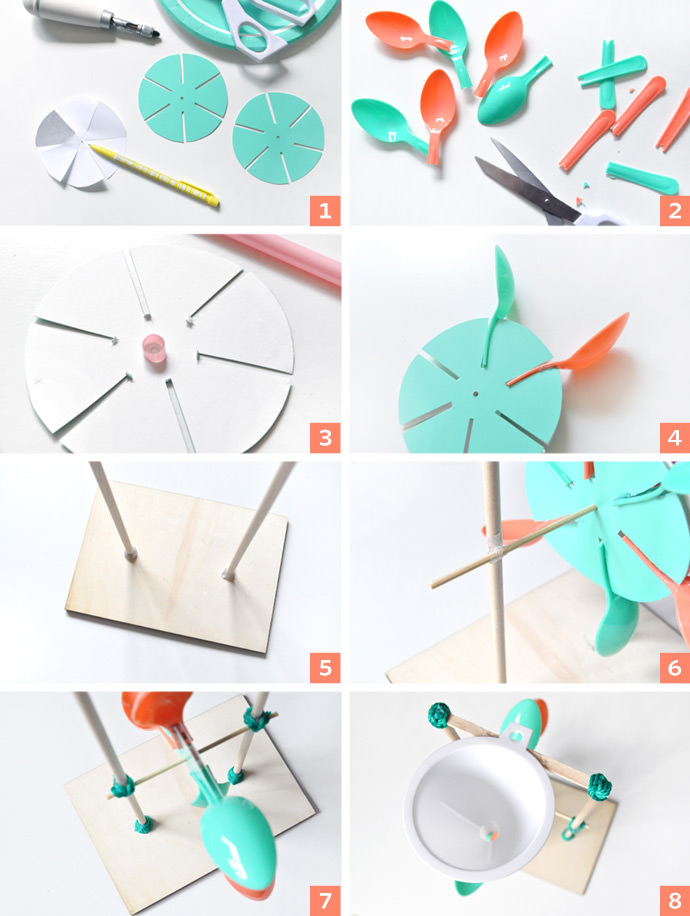
- On some scrap paper, trace a circle and mark the center. Fold the paper circle in half, then into thirds so that when unfolded there are six equal segments. Cut a slit along each fold line leaving about ¾” untouched. Use this paper circle template to trace and cut two identical circles out of paper plates, but you may need to cut the slits wider to accommodate for yours plastic spoons. Use the screw punch to make holes through the center points.
- Use scissors to carefully cut the handles off of the six plastic spoons, leaving enough that they will fit nicely into the slits you cut into the circles and the spoon bowl sits right at the edge.
- Cut a tiny snip off of a plastic straw (about ¼” to ½”) and use a tiny dab of hot glue to attach it around the center hole of one of the plates. Make sure to attach it to the uncolored side! Use another dab of glue on the straw to attach the second circle, lining the slits up.
- Place the cut plastic spoons into each slit and use hot glue to secure in place.
- Hot glue the two wooden dowels onto the wooden base, holding until dry and secure.
- Put a wooden skewer through the center hole of the wheel and then glue the wooden skewer to each wooden dowel so that the wheel can spin without hitting the base.
- Cut off any excess wooden skewer and then use string to wrap around the joints to secure, hot gluing the end in place. You can also add some string around the base of the dowel to hide any visible hot glue.
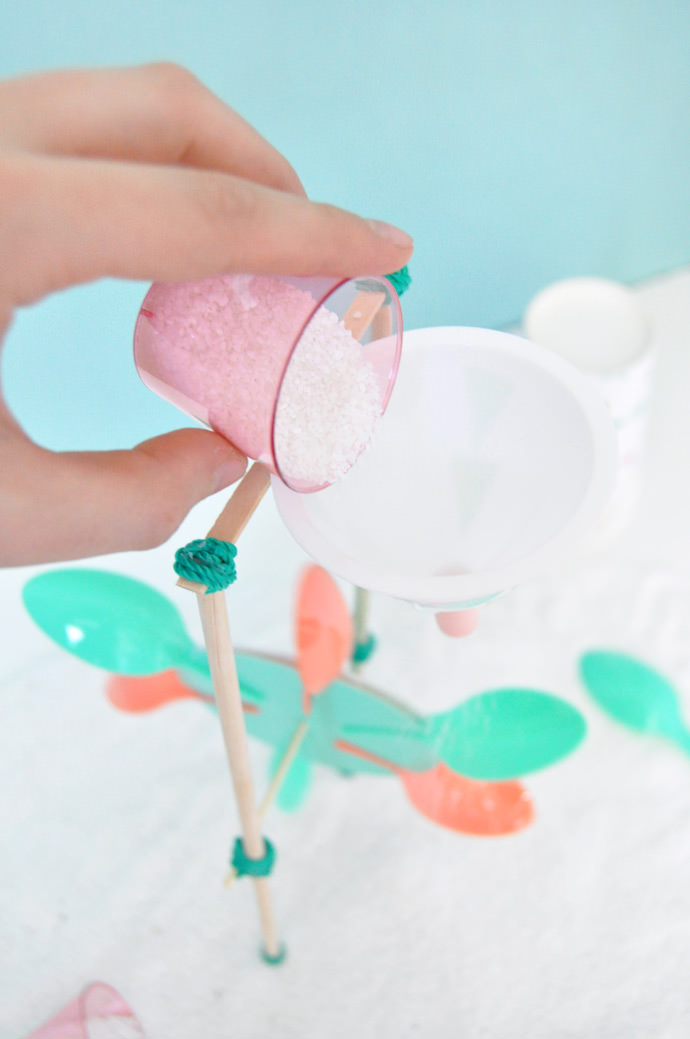
- Hot glue a wooden coffee stir stick onto the top of the two wooden dowels, removing the excess on the sides. Wrap and glue string around the joints as before, and then glue the edge of the funnel onto the very top. Use washi tape to decorate the funnel if desired.

Happy crafting!
from Handmade Charlotte http://www.handmadecharlotte.com/diy-sand-mill-toy/?utm_medium=feed&utm_source=feedpress.me&utm_campaign=Feed%3A+hcrss
No comments:
Post a Comment