One of our mottos here is to reduce, reuse, and recycle! Some of our all-time favorite craft projects are born from recycling or repurposing materials and we do it as often as we can! We hold onto neat looking bottles and cool colored containers for as long as possible, and then turn it all into a super fun craft! Some crafty messes do need a trash bag though, and we can always count on Glad. Crafting and DIY messes are no match for Glad’s new Kitchen Pro trash bags – they come with double the protection making it Glad’s biggest, strongest kitchen trash bag yet!

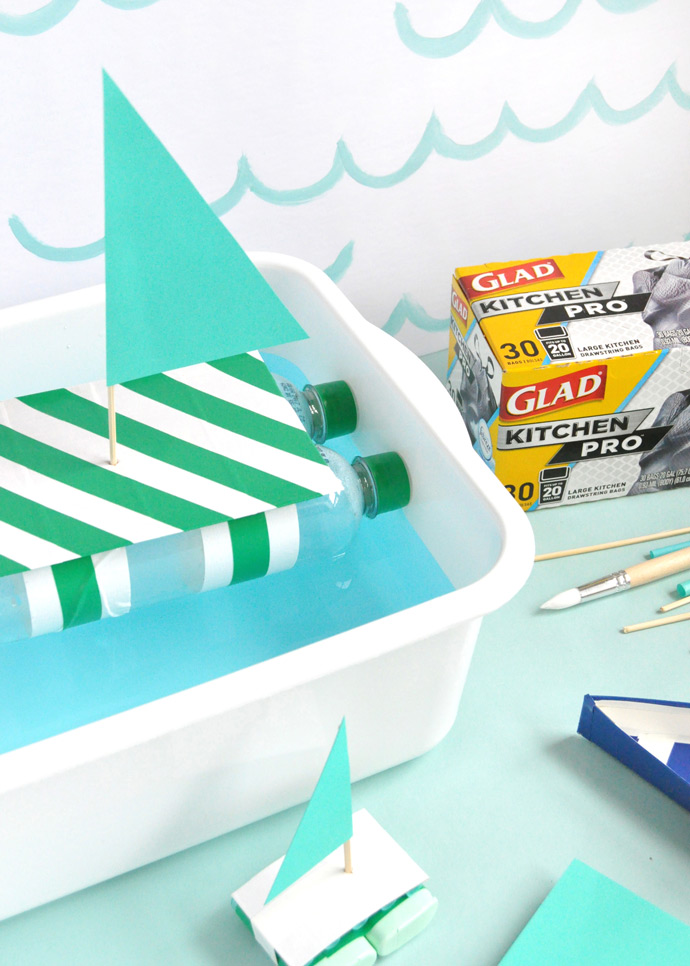
This time, we spent an afternoon dreaming up these DIY boats. Most of our recyclables are clear or neutral in color, so we decorated them with blue and green tape for a playful, nautical vibe. We made a few different styles of boats using the materials we had on hand, but the possibilities are really endless! Keep on reading for a free printable template to make your own custom paper boats. When we were done crafting for the day, we put all our supplies away, toss the recyclables in the bin, and anything we can’t possibly repurpose anymore goes into the trash. Glad Kitchen Pro offers 53% more bag, for 53% more fun – so go ahead, enjoy more fun-filled crafty afternoons!

What You Need

- Free printable boat template (download here)
- Thin cardboard
- Colored paper
- Duct and/or electrical tape
- Wooden skewers
- Colored straws
- Scissors
- Ruler
- Empty bottles and containers
- Paint (for a nautical backdrop!)
- Paintbrush
- Pencil
- Hot glue gun
How-To

Step 1
Print out the boat template and cut out. Trace onto a piece of thin cardboard, like an empty cereal box.

Step 2
Cut out the cardboard boat and fold along the dotted lines.

Step 3
Use hot glue to secure the tabs together to form a triangle-shaped boat. Now the fun part – start covering your boat with duct tape! This will help keep your boat dry in water.

Step 4
Continue covering your boat with duct tape. Electrical tape is a great option too – we used it here to make these stripes inside the boat.

Step 5
To make the sail, cut a paper triangle and hot glue one edge to a wooden skewer. You can play around with the size of your sail, but this one was 3 1/4” across the bottom and 4 1/2” tall. Use paint or tape to decorate your sails if you like!

Step 6
Use a dab of hot glue to temporarily attach the wooden skewer into the center of the boat, holding it in place until dry. To make it more secure, cut a piece of electrical tape about 1” long and snip one edge into mini fringe. Wrap the tape around the skewer, pressing the fringed tape onto the boat to secure. Your paper boat is now complete!

Step 7
For a pontoon-style boat, cut a piece of cardboard into a rectangle to be the top-raft portion of the boat. Cover the cardboard in tape.

Step 8
Use more tape to attach two water bottles together, and then tape or hot glue the raft on top. Make and attach a sail the same way as before.

Step 9
For an even simpler boat, use an empty shampoo or conditioner bottle as the base, decorate with tape, and attach the sail on top.


Check out glad.com for more information.
This is a sponsored conversation written by me on behalf of Glad. The opinions and text are all mine.
from Handmade Charlotte http://www.handmadecharlotte.com/diy-recycled-boats/?utm_medium=feed&utm_source=feedpress.me&utm_campaign=Feed%3A+hcrss
No comments:
Post a Comment