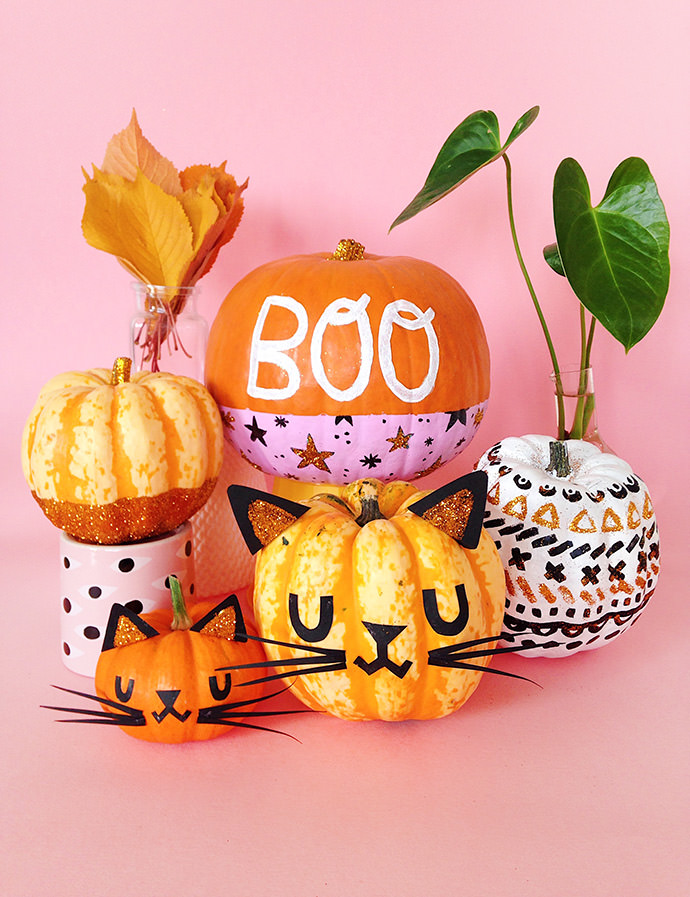
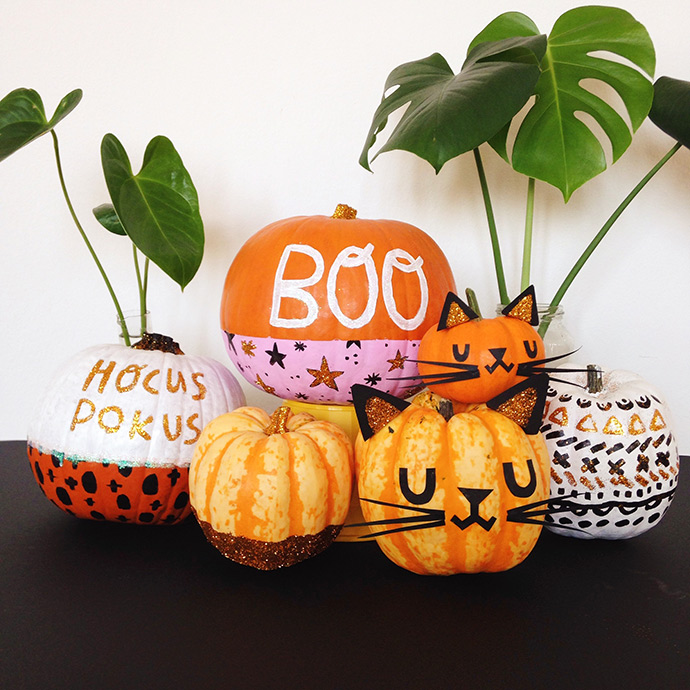
For Halloween decor, I prefer to pass on the gore and double-down on the GLAM! These glitzy painted pumpkins (or squash! or gourds!) let you bring the beautiful golden colors of autumn inside with the help of golden glitter. If you have multiple pumpkins to decorate, sticking with the same limited color palette is a great way to create a little pumpkin patch that’s ready to mix-and-match.
what you need:
- Folk Art Multisurface Acrylic Paint (white, black, and light pink)
- Paintbrushes (small, medium, and large)
- Mod Podge Gloss
- Masking tape
- Scissors
- Glitter (white and gold)
- Thick black paper or black cardstock
- Pumpkin/Squash/Gourd to decorate
Optional:
- Pencil for sketching the design onto the pumpkin
- Paper and small containers (to capture and reuse excess glitter)
- Spare bowl or flower pot to hold pumpkin while painting
- Baby wipe or damp cloth for minor messes
how-to:
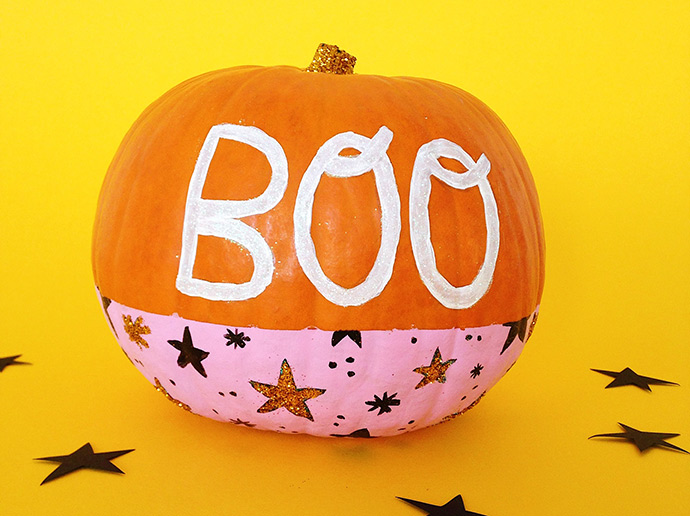
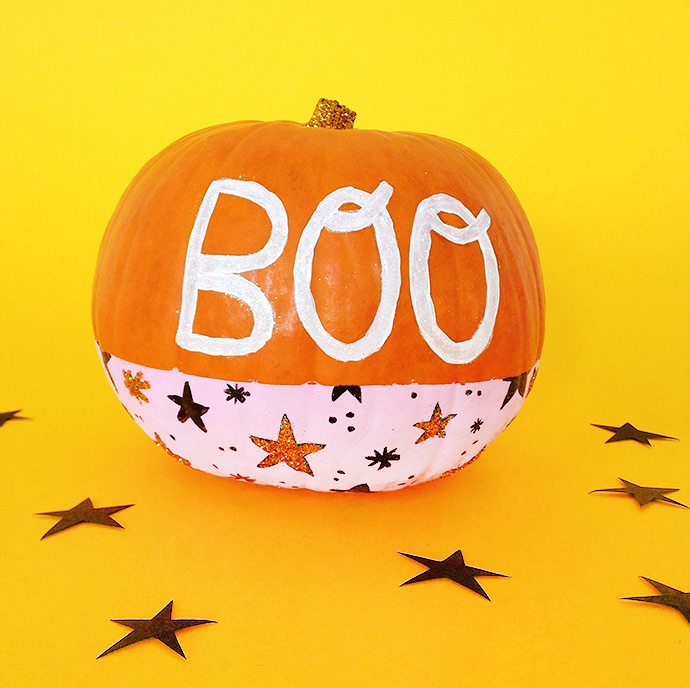
BOO Pumpkin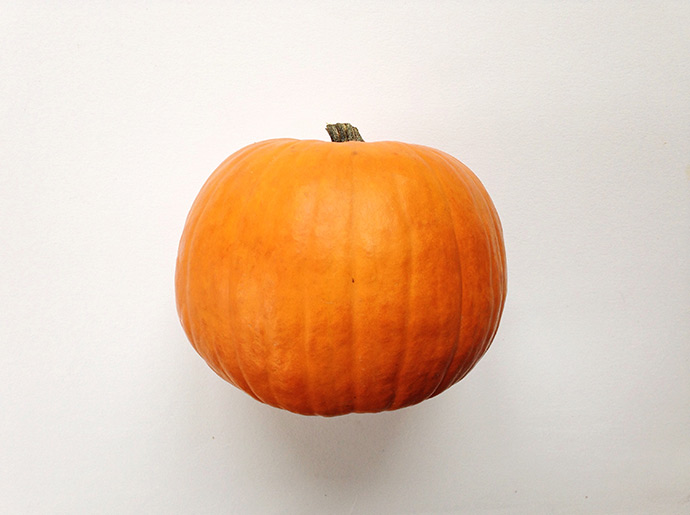
Step 1
Pick your pumpkin.
Step 2
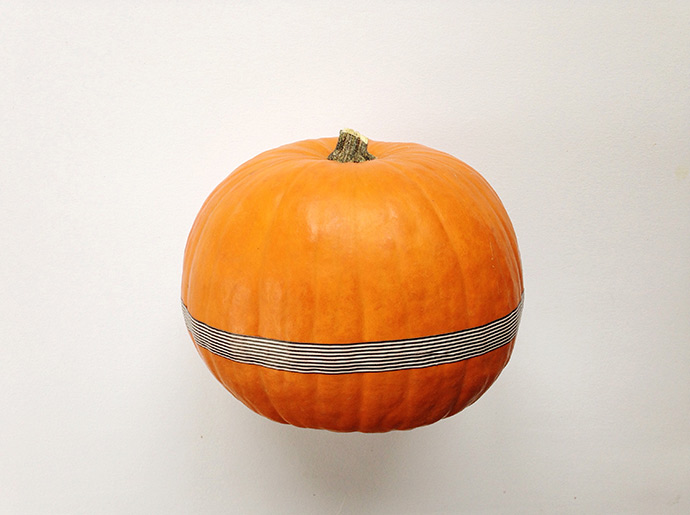
Put masking tape around the pumpkin to section off where you will paint and to help create a straight edge. Tip: run your fingernail along the tape to make sure it sticks down into the small crevices of the pumpkin to help create a crisper line.

Step 3
Paint the bottom section of your pumpkin. Add a second coat if needed. Remove tape. Allow to dry completely. Propping the pumpkin in a spare bowl or flowerpot can make this much easier.
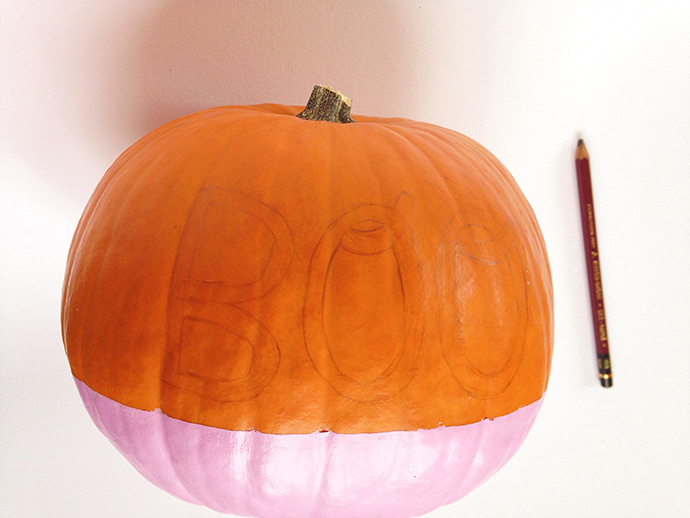
Step 4
Use a pencil to sketch “BOO“ or other design onto the top section of the pumpkin.

Step 5
Fill in the design with white paint. Allow to dry completely.
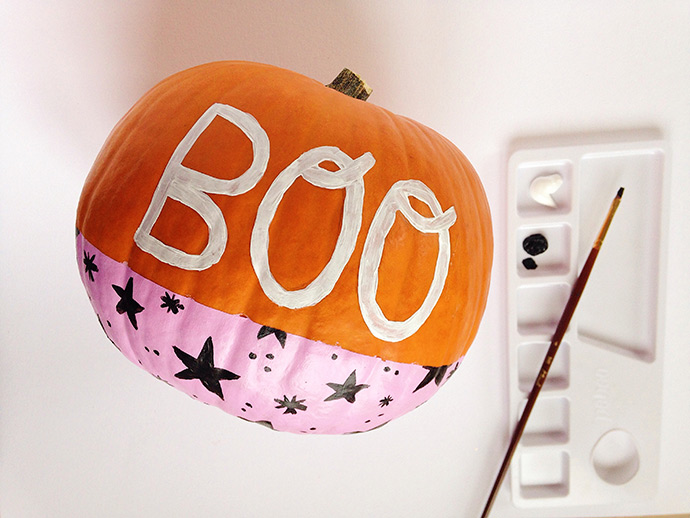
Step 6
With black paint, add stars, dots, or other details to the pink section of the pumpkin.
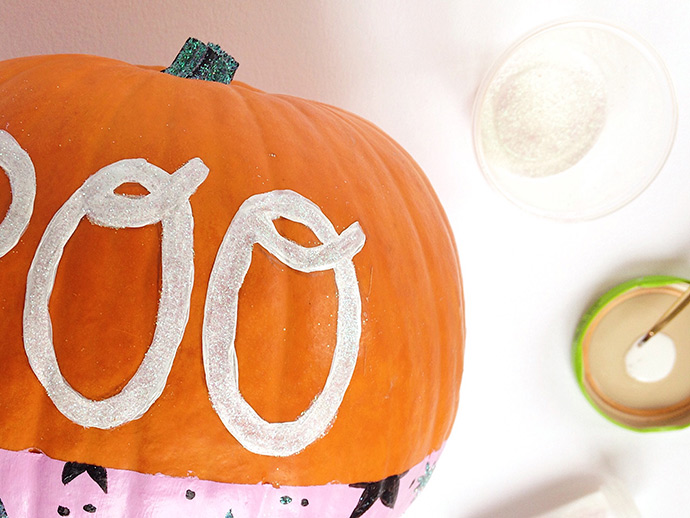
Step 7
Paint over “BOO“ with glue and sprinkle with white glitter.
Step 8
Add a few golden details: Paint the pumpkin stem with glue and cover with gold glitter. Select a few stars; cover with glue and sprinkle with gold glitter.
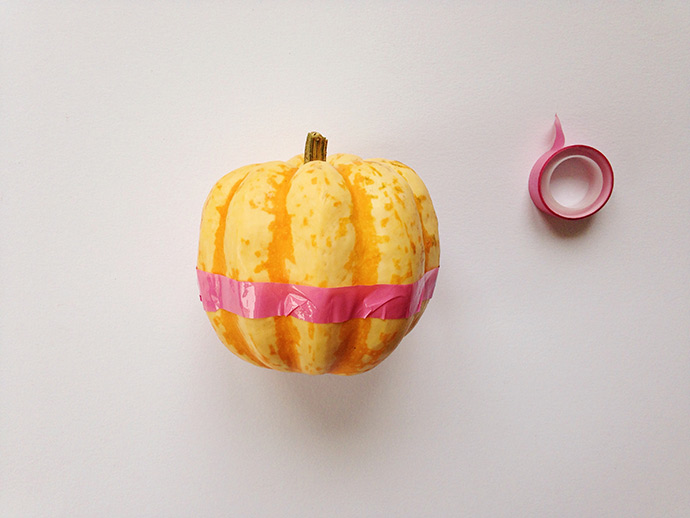
Step 1
Put masking tape around the pumpkin to section off an area and to help create a straight edge. Tip: run your fingernail along the tape to make sure it sticks down into the crevices of the pumpkin to help create a crisper line.
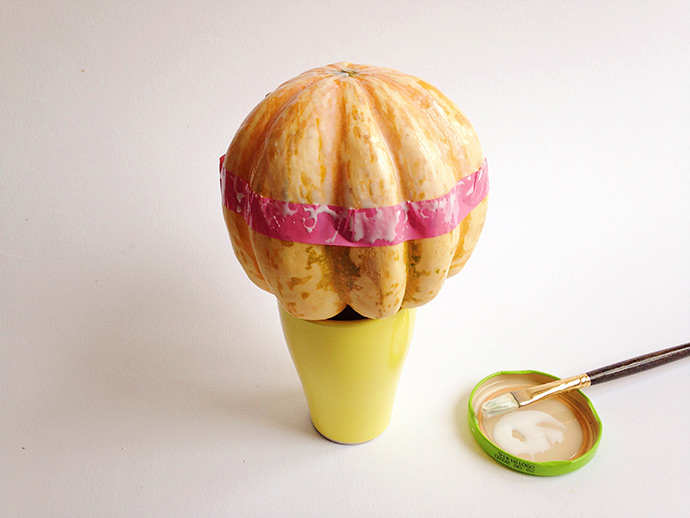
Step 2
Place pumpkin upside down in an extra bowl or flower pot. Cover with a layer of Mod Podge.
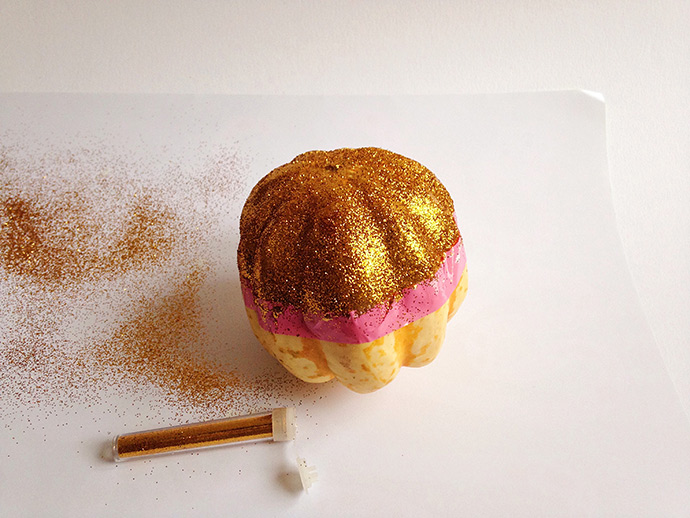
Step 3
Cover with gold glitter.
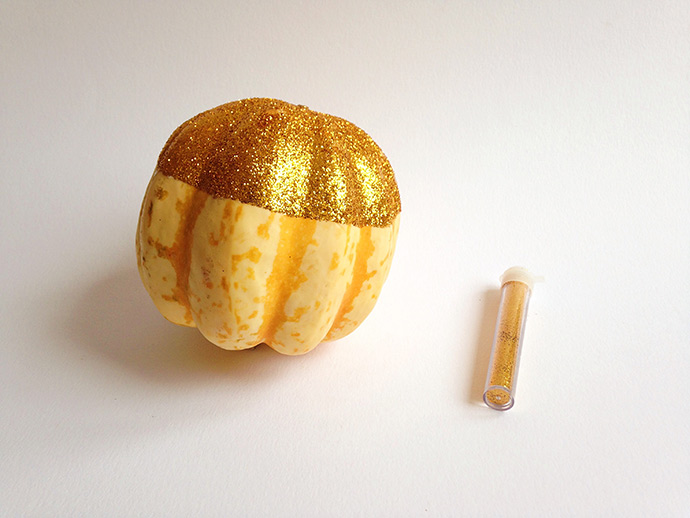
Step 4
Remove tape and allow to dry completely.
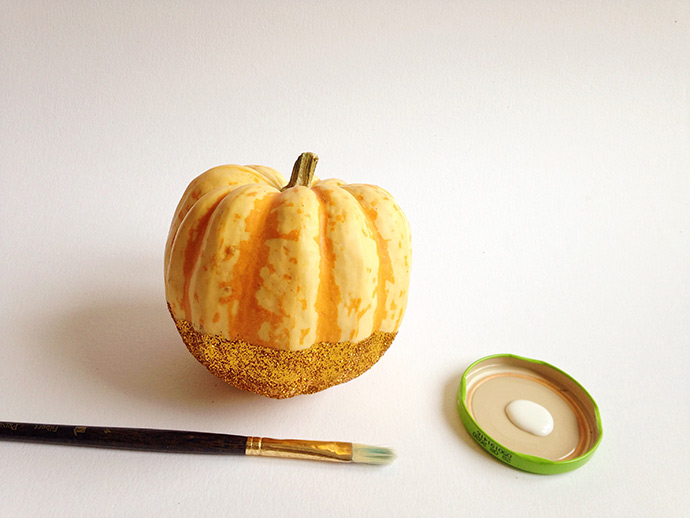
Step 5
Once dry, paint stem with more Mod Podge.

Step 6
Cover with gold glitter and allow to dry completely.
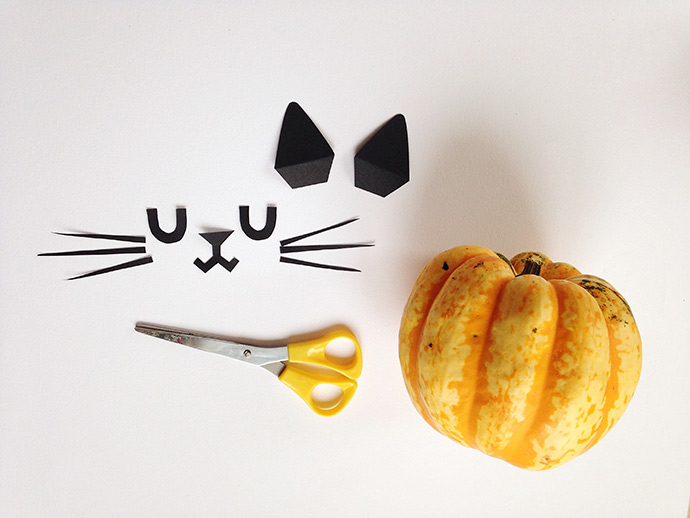
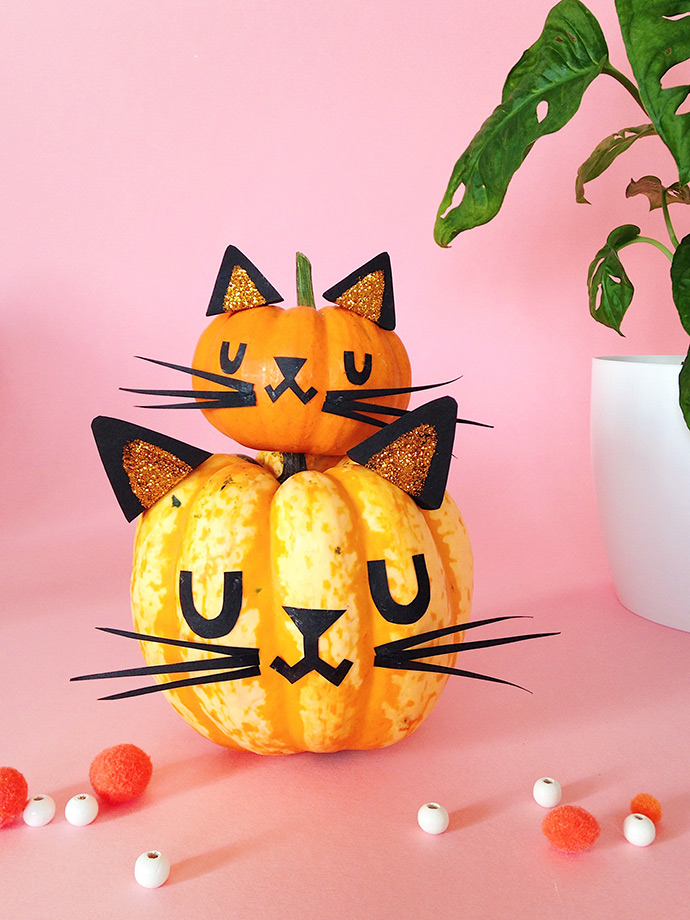
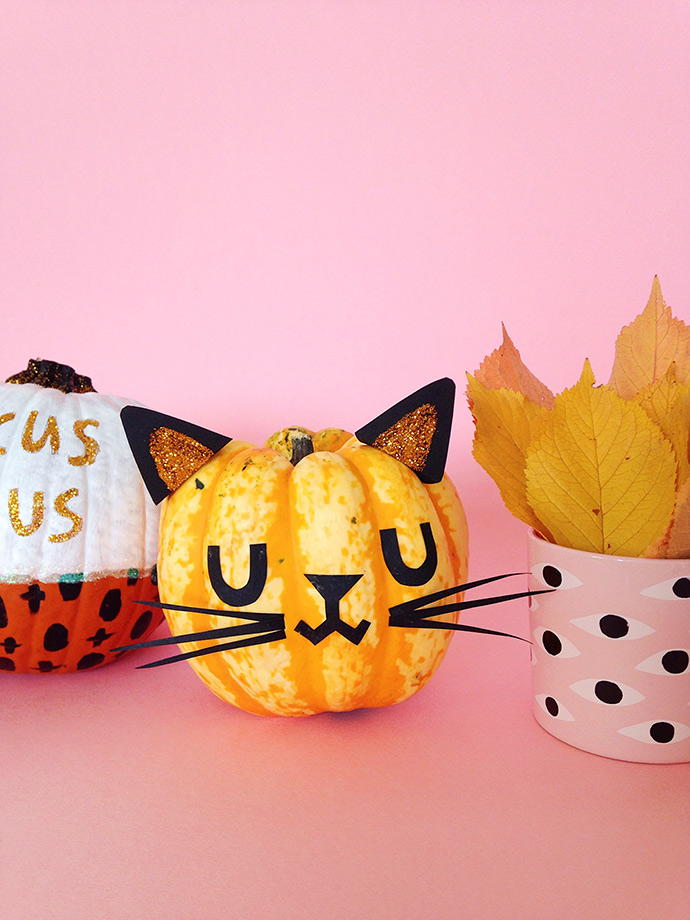
Step 1
Use black paper to cut out ears, eyes, nose/mouth, and whiskers to create a cat face. Be sure to leave extra paper at the bottom of each ear to create a tab where they can be attached to the pumpkin, approximately 1/4 inch to 1/2 inch.
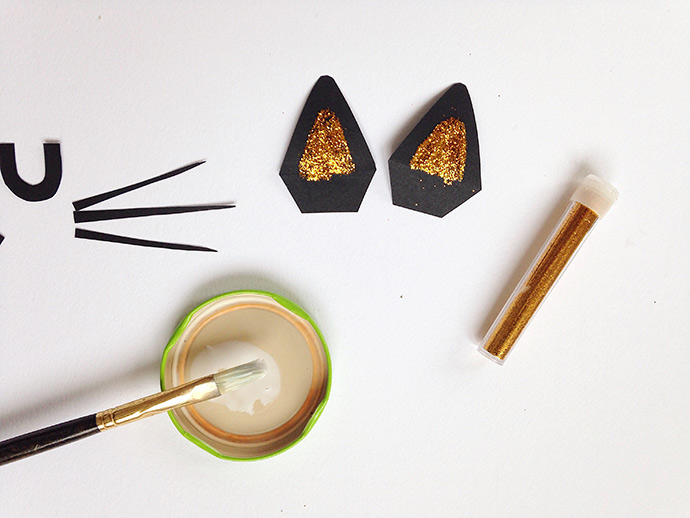
Step 2
Use Mod Podge to paint a triangular “inner ear“ on each ear and cover with gold glitter.

Step 3
Use Mod Podge to attach all elements to the pumpkin.
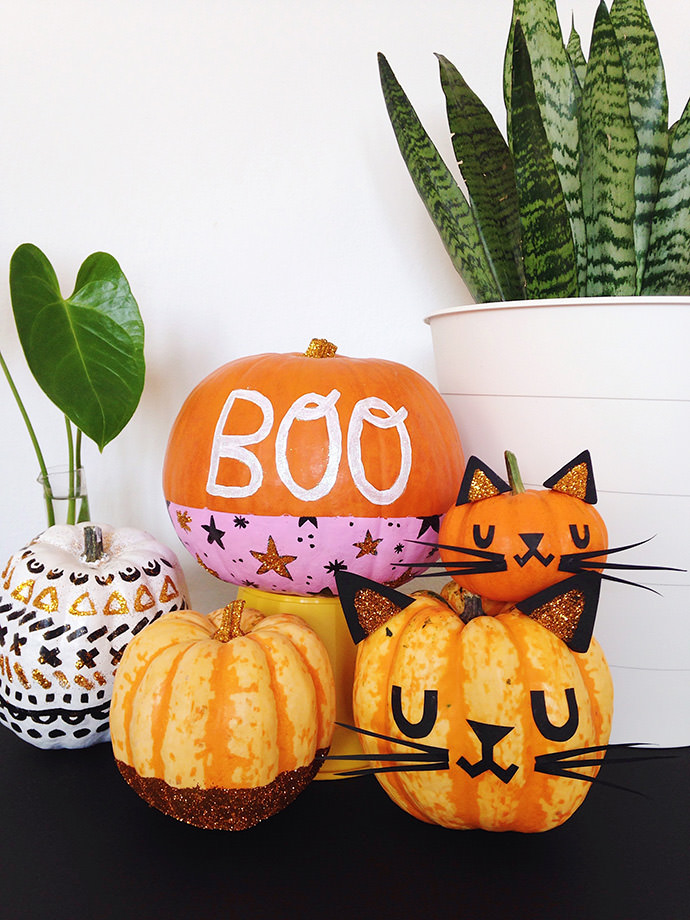

Happy Halloween!
from Handmade Charlotte https://www.handmadecharlotte.com/no-carve-glitter-pumpkins/?utm_medium=feed&utm_source=feedpress.me&utm_campaign=Feed%3A+hcrss
No comments:
Post a Comment